Content Creation

Yasmina Akni Ebourki
Last updated: Jan 27, 2026
Did you schedule a LinkedIn post and have no idea where it went?
Whether you scheduled or submitted it to a group, it may feel like your LinkedIn pending post just vanished.
However, you can find your list of pending posts on LinkedIn with just a few clicks.
This guide shares how to track down your posts and easily manage them.
The Difference Between LinkedIn Pending Posts and Drafts
Is there any difference between LinkedIn pending posts and drafts?
A LinkedIn pending post is a completed post for which you’ve chosen a date and time to be published automatically, so you don’t have to do it manually.
A draft is an unfinished version of content you started writing but haven’t scheduled to go live.

Understanding what they are and how you can use them in your LinkedIn content strategy will help you move faster and achieve posts that deliver better results.
How LinkedIn Handles Drafts and Scheduled Posts
In the beginning, LinkedIn didn’t allow us to modify scheduled posts once they were set; we could only adjust the time and view them.
However, LinkedIn has made some small changes to how drafts and scheduled posts work.
Now, you can preview your post before it's posted on your account.
Although the visibility isn’t perfect yet, LinkedIn has been gradually improving it.
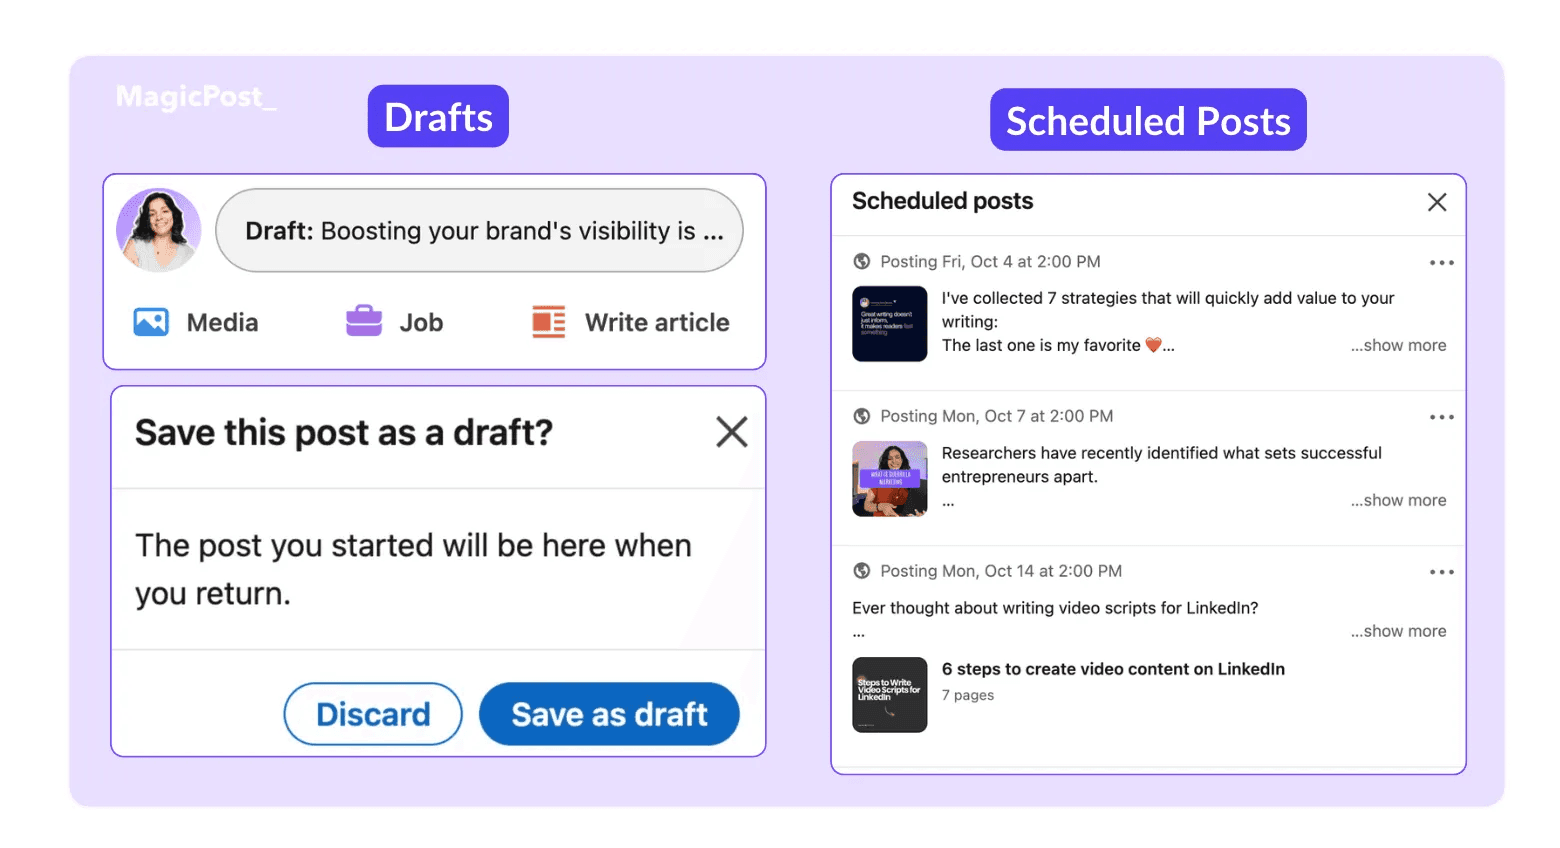
You can now see a chronological list of titles, preview images, and even view the number of photos that will appear in a carousel.
How to Find Your LinkedIn Pending Posts
LinkedIn has made it easier to schedule posts, but finding them later isn’t always obvious, especially the first time.
Here’s how you can easily find your LinkedIn pending posts:
On the Home page, start a post and find the clock icon in the bottom right corner next to the “Post” button.
Click the clock icon, and a small pop-up will appear with the dates to schedule your post.
Below the list, you’ll see the option to “View all my scheduled posts.”
This allows you to view all your scheduled posts for the week or month, along with the posting times and other relevant details.
Though these steps may seem many at first, you'll soon realize that organizing and scheduling your content will save you a lot of time.

Can’t find one of your scheduled posts? Chances are LinkedIn saved it as a draft. Here’s how you can check:
How to Find LinkedIn Post Drafts
First and foremost, you should know that for traditional posts, drafts and scheduled posts are not in the same place.
Here's how to find your LinkedIn drafts:
Go to the Home page and click on “Start a Post.”
Begin writing your post. If you decide to stop, click the “X” to close the window.
LinkedIn will prompt you with the option to save your post as a draft.
Unfortunately, LinkedIn allows you to save only one draft at a time.
However, you can always use external tools like Notion or your phone’s notes app to store additional drafts.
Currently, the only type of posts where you can save multiple drafts are articles.

How to Access Drafts on Desktop vs Mobile
There is a subtle difference between accessing drafts on desktop and mobile:
When creating a simple post on desktop or mobile:
Start typing your post.
If you decide to stop, click the “X” to close the window.
LinkedIn will prompt you to save the post as a draft. Confirm by selecting “Save as draft.”
Keep in mind that, just like on desktop, LinkedIn only allows you to save one draft at a time for traditional posts, whether you’re using the desktop or mobile version.

Lastly, to find your scheduled posts, you can also view them directly on your phone by following the same steps we covered earlier.
How to Find a Pending Post in a LinkedIn Group
If you’ve submitted a post to a LinkedIn group, finding it can be a bit tricky.
LinkedIn group posts are not visible within the Scheduled posts page.
So, how can you find your pending posts in LinkedIn groups?
Once you submit a post, you'll receive a notification indicating that it's awaiting admin approval. To see your submitted post, click on View post. This will take you to the pending post where you can edit or delete it.

If you close the LinkedIn notification, you won’t be able to edit or delete your post until it goes live.
Now, if you change your mind and don’t want your post to go live, you should contact the group admins. They can manage the pending posts and remove your posts.
If your LinkedIn group post is pending for 14 days, it gets automatically deleted.
FAQ
How can I edit scheduled posts on LinkedIn?
To edit a scheduled post on LinkedIn, start writing a new post then, click the clock icon, select “View all scheduled post" and click the three dots to edit.
Can I delete LinkedIn pending posts?
Yes, you can delete, edit, or reschedule your pending posts.
How do I find post drafts on LinkedIn?
The easiest way to find your LinkedIn post drafts is to go to the drafts page. There, you can continue writing, schedule your posts, or publish them instantly.
How many posts can I schedule on LinkedIn?
LinkedIn doesn’t have a clear limit on how many posts you can schedule. However, managing a large number of scheduled posts can be difficult.
If you’re planning to schedule content in bulk, using a LinkedIn automation tool helps you stay organized.
